qemu from zero 2 hero

Table of Contents
算是了却了大二入门kernel pwn未果的心结
- Ubuntu 20
- qume7.2.4
源码安装qemu #
apt intsall版本太低
https://www.qemu.org/download/
wget https://download.qemu.org/qemu-7.2.4.tar.xz
tar xvJf qemu-7.2.4.tar.xz
cd qemu-7.2.4
./configure
sudo make -j8  # 多核编译
sudo make insatll
中间缺什么apt直接装就是
make install 可能会环境变量添加失败,无所谓,直接如下运行
sudo /usr/local/test/bin/qemu-aarch64
安装mips amd64所需的libc(瞎装一通)
在/user下应该能找到交叉编译所需要的库
qemu
ljahum@ljahum-vm ~/D/test> ls /usr/
aarch64-linux-gnu/  include/  lib64/    local/             sbin/
bin/                lib/      libexec/  mipsel-linux-gnu/  share/
games/              lib32/    libx32/   mips-linux-gnu/    src/
ljahum@ljahum-vm ~/D/test> ls /usr/aarch64-linux-gnu/
bin/  include/  lib/
ljahum@ljahum-vm ~/D/test>
编译运行 #
写个玩具
#include <stdio.h>
#include <string.h>
int main(){
    printf("hello world\ninput ur emotion\n");
    char str[200];
    scanf("%s",str);
    printf("u say : %s\n",str);
    if(!strcmp(str,"hello")){
        printf("you good\n");
    }
    else if(!strcmp(str , "end")){
        printf("you bad\n");
    }
    // printf("end\n");
    return 0;
}
aarch64-linux-gnu-gcc ./main.c -o amd64out -static
运行
ljahum@ljahum-vm ~/D/test> ls /usr/aarch64-linux-gnu/
bin/  include/  lib/
ljahum@ljahum-vm ~/D/test> qemu-aarch64 amd64out
hello world
input ur emotion
hello
u say : hello
you good
ljahum@ljahum-vm ~/D/test> file amd64out
amd64out: ELF 64-bit LSB executable, ARM aarch64, version 1 (GNU/Linux), statically linked, BuildID[sha1]=84b60fe12f86c039ffcd221a4e32a1c766677293, for GNU/Linux 3.7.0, not stripped
ljahum@ljahum-vm ~/D/test>
qemu用户模式调试 #
先安装gdb-multiarch
sudo apt install gdb-multiarch
qemu启动脚本
-L 指定动态连接库位置 此时用于是静态链接 所以可加可不加
-g指定 挂载端口
qemurun.sh
#!/bin/bash
sudo /usr/local/test/bin/qemu-aarch64 \
    -L /usr/aarch64-linux-gnu/ \
    -g 1234 \
    ./amd64out
gdb启动脚本
gdbrun.sh
#!/bin/bash
gdb-multiarch -q ./amd64out -x dbgscript
gdb-multiarch 行内命令脚本
dbgscript:
#dbgscript

set architecture aarch64
b main
target remote 127.0.0.1:1234
c
先运行qemu启动脚本
ljahum@ljahum-vm ~/D/test> sudo ./qemurun.sh
hello world
input ur emotion
end
u say : end
再运行gdb启动脚本
ljahum@ljahum-vm ~/D/test> sudo ./gdbrun.sh
pwndbg: loaded 147 pwndbg commands and 46 shell commands. Type pwndbg [--shell | --all] [filter] for a list.
pwndbg: created $rebase, $ida GDB functions (can be used with print/break)
Reading symbols from ./amd64out...
(No debugging symbols found in ./amd64out)
The target architecture is assumed to be aarch64
Breakpoint 1 at 0x928
warning: remote target does not support file transfer, attempting to access files from local filesystem.
0x0000005502814100 in ?? () from /lib/ld-linux-aarch64.so.1
warning: Could not load shared library symbols for /lib/libc.so.6.
Do you need "set solib-search-path" or "set sysroot"?

Breakpoint 1, 0x0000005500000928 in main ()
------- tip of the day (disable with set show-tips off) -------
Want to NOP some instructions? Use patch <address> 'nop; nop; nop'
LEGEND: STACK | HEAP | CODE | DATA | RWX | RODATA
────────────[ REGISTERS / show-flags off / show-compact-regs off ]─────────────
*X0   0x5500010000 ◂— 0x10102464c457f
*X1   0x5502812568 —▸ 0x550281279f ◂— './amd64out-lib'
*X2   0x5502812578 —▸ 0x55028127ae ◂— 'SUDO_GID=0'
*X3   0x550000091c (main) ◂— stp x29, x30, [sp, #-0xe0]!
 X4   0x0
*X5   0xb25a824f20c39041
*X6   0x55029c8b10 ◂— 0x0
*X7   0x1
*X8   0xffffffffffffffff
*X9   0xfffffff
 X10  0x0
 X11  0x0
*X12  0x550285ce48 ◂— 0x0
 X13  0x0
 X14  0x0
*X15  0x6fffff47
*X16  0x1
*X17  0x5502879d28 ◂— 0xb0000a64a9ab7bfd
*X18  0x73516240
*X19  0x55000009f8 (__libc_csu_init) ◂— stp x29, x30, [sp, #-0x40]!
 X20  0x0
*X21  0x5500000810 (_start) ◂— mov x29, #0
 X22  0x0
 X23  0x0
 X24  0x0
 X25  0x0
 X26  0x0
 X27  0x0
 X28  0x0
*X29  0x5502812330 —▸ 0x5502812410 ◂— 0x0
*X30  0x5502879e10 ◂— 0xf9402fe0940055f4
*SP   0x5502812330 —▸ 0x5502812410 ◂— 0x0
*PC   0x5500000928 (main+12) ◂— ldr x0, [x0, #0xfe0]
─────────────────────[ DISASM / aarch64 / set emulate on ]─────────────────────
 ► 0x5500000928 <main+12>    ldr    x0, [x0, #0xfe0]
   0x550000092c <main+16>    ldr    x1, [x0]
   0x5500000930 <main+20>    str    x1, [sp, #0xd8]
   0x5500000934 <main+24>    mov    x1, #0
   0x5500000938 <main+28>    adrp   x0, #0x5500000000
   0x550000093c <main+32>    add    x0, x0, #0xa98
   0x5500000940 <main+36>    bl     #puts@plt                 <puts@plt>

   0x5500000944 <main+40>    add    x0, sp, #0x10
   0x5500000948 <main+44>    mov    x1, x0
   0x550000094c <main+48>    adrp   x0, #0x5500000000
   0x5500000950 <main+52>    add    x0, x0, #0xab8
───────────────────────────────────[ STACK ]───────────────────────────────────
00:0000│ x29 sp 0x5502812330 —▸ 0x5502812410 ◂— 0x0
01:0008│        0x5502812338 —▸ 0x5502879e10 ◂— 0xf9402fe0940055f4
02:0010│        0x5502812340 ◂— 0x0
03:0018│        0x5502812348 ◂— 0xffffffff
04:0020│        0x5502812350 ◂— 0x0
05:0028│        0x5502812358 —▸ 0x55028678b8 ◂— 0xc001200005b6e /* 'n[' */
06:0030│        0x5502812360 —▸ 0x5502846a00 —▸ 0x5502859000 ◂— 0x3010102464c457f
07:0038│        0x5502812368 ◂— 0x0
─────────────────────────────────[ BACKTRACE ]─────────────────────────────────
 ► 0     0x5500000928 main+12
───────────────────────────────────────────────────────────────────────────────
pwndbg>
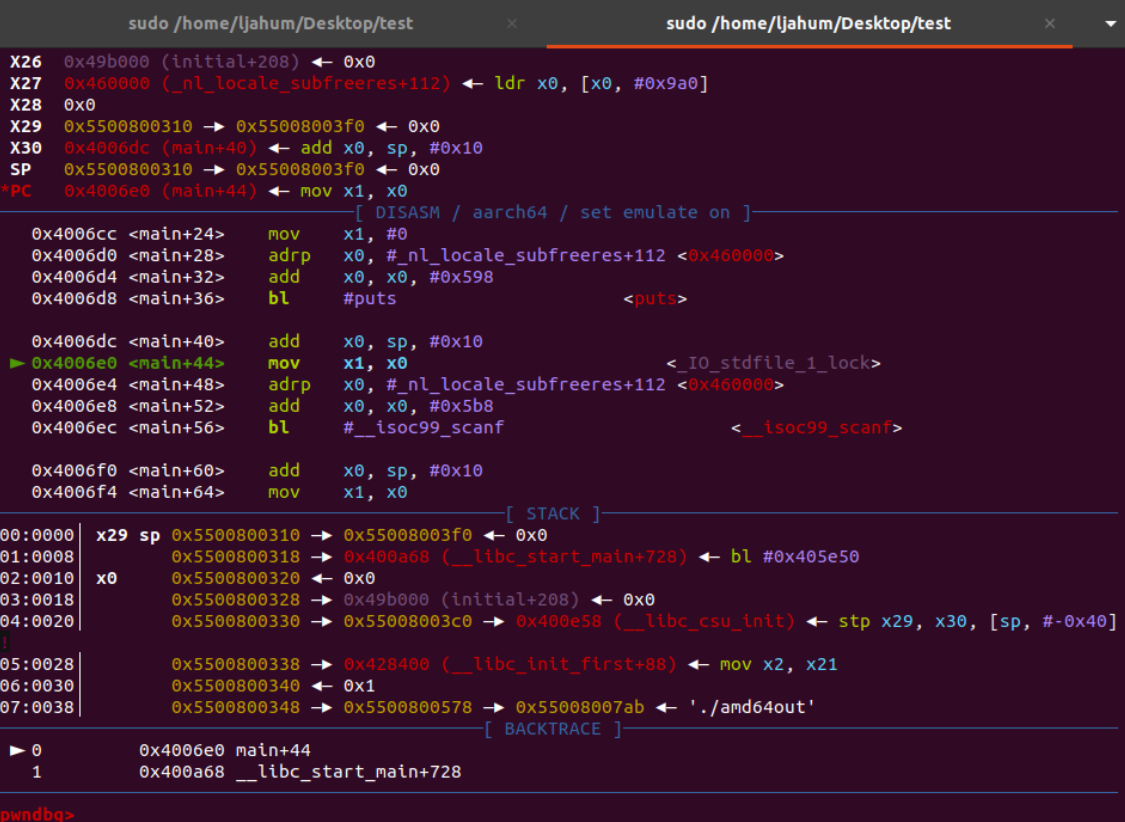
按 n 单步开调
调试动态链接文件 #
不添加 -static 编译
aarch64-linux-gnu-gcc ./main.c -o amd64out-lib
此时需要 -L 指定 /libs 目录的位置
#!/bin/bash
sudo /usr/local/test/bin/qemu-aarch64 \
    -L /usr/aarch64-linux-gnu/ \
    ./amd64out-lib
ljahum@ljahum-vm ~/D/test> sudo ./qemurun.sh
hello world
input ur emotion
hello
u say : hello
you good
系统模式 #
TO DO
模拟运行ARM64架构内核 #
本来想做个aarch64跑系统模式 没想到翻到了内核的文章
https://blog.csdn.net/weixin_39541632/category_9432131.html
容易出错的点:
挂载 #
$ mkdir -p tmpfs
$ sudo mount -t ext4 linux_rootfs.ext4 tmpfs/ -o loop
$ sudo cp -af linux_rootfs/* tmpfs/
$ sudo umount tmpfs
$ sudo chmod 777 linux_rootfs.ext4
挂载拷贝在 /root 下进行

给予权限后运行
sudo chmod 777 ./*
sudo ./run.sh
用户名默认root
交叉编译 strace 并安装 #
在root下clone strace
root@ljahum-vm:~# ls ./strace/
aclocal.m4      config.status   LGPL-2.1-or-later                                README-hacking
attic           configure       m4                                               README.md
AUTHORS         configure.ac    maint                                            src
autom4te.cache  COPYING         Makefile                                         strace.spec
bootstrap       CREDITS.in      Makefile.am                                      strace.spec.in
build-aux       debian          Makefile.in                                      strace.svg
bundled         dist            NEWS                                             tests
ChangeLog-CVS   doc             README                                           tests-m32
ci              INSTALL         README-configure                                 tests-mx32
config.log      INSTALL-git.md  README-github_gitlab-autogenerated-archives.txt  tmp.sh
root@ljahum-vm:~# pwd
/root
root@ljahum-vm:~#
在/root 下解压gdb
解压gdb8的命令
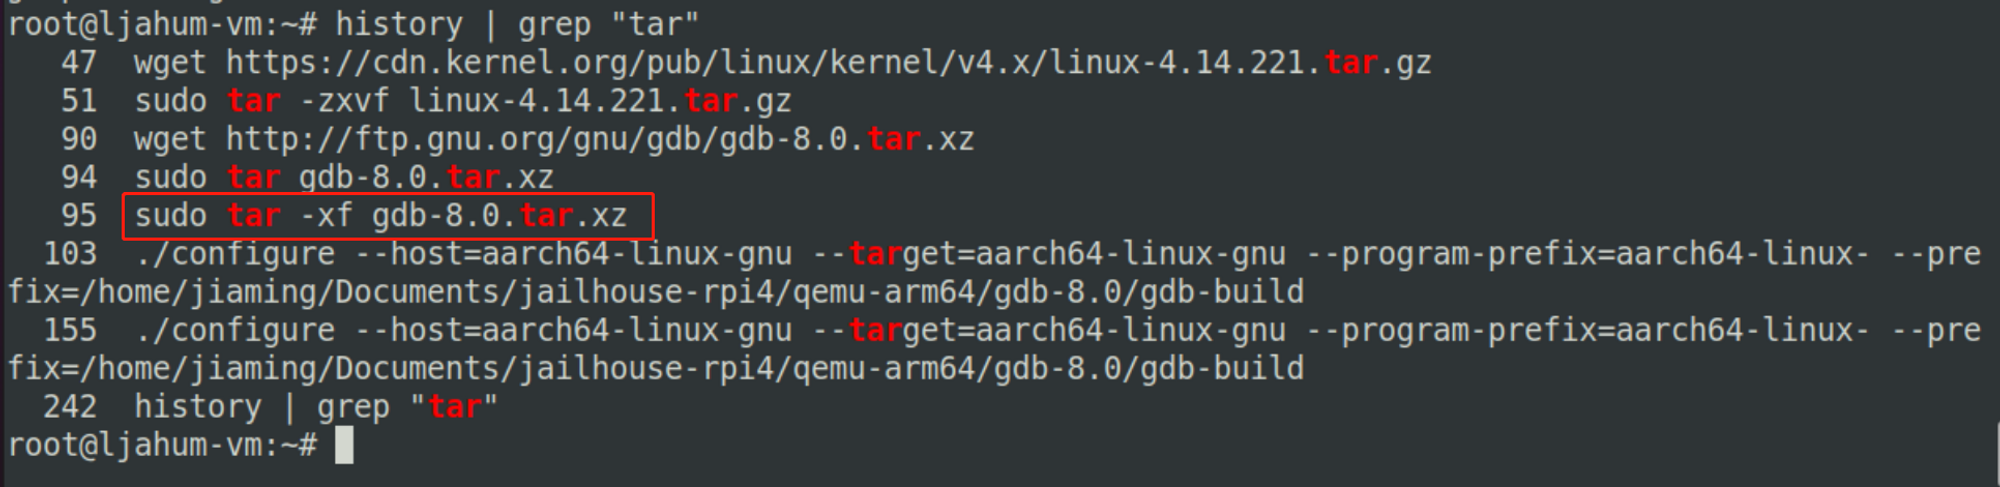
在make前的
./configure --host=aarch64-linux-gnu --target=aarch64-linux-gnu --program-prefix=aarch64-linux- \
--prefix=/home/jiaming/Documents/jailhouse-rpi4/qemu-arm64/gdb-8.0/gdb-build
可以把–prefix后面的目标目录换成自己user的目录
make error #
如果make install出现了
https://blog.csdn.net/weixin_44602409/article/details/115716913
的bug1
修改以下文件
root@ljahum-vm:~/gdb-8.0# ls -l ./gdb/nat/linux-ptrace.*
-rw-rw-rw- 1 ljahum 200 18011 8月  10 22:58 ./gdb/nat/linux-ptrace.c
-rw-rw-rw- 1 ljahum 200  7709 8月  10 22:59 ./gdb/nat/linux-ptrace.h
root@ljahum-vm:~/gdb-8.0# pwd
/root/gdb-8.0
root@ljahum-vm:~/gdb-8.0#
linux-ptrace.c
注释掉
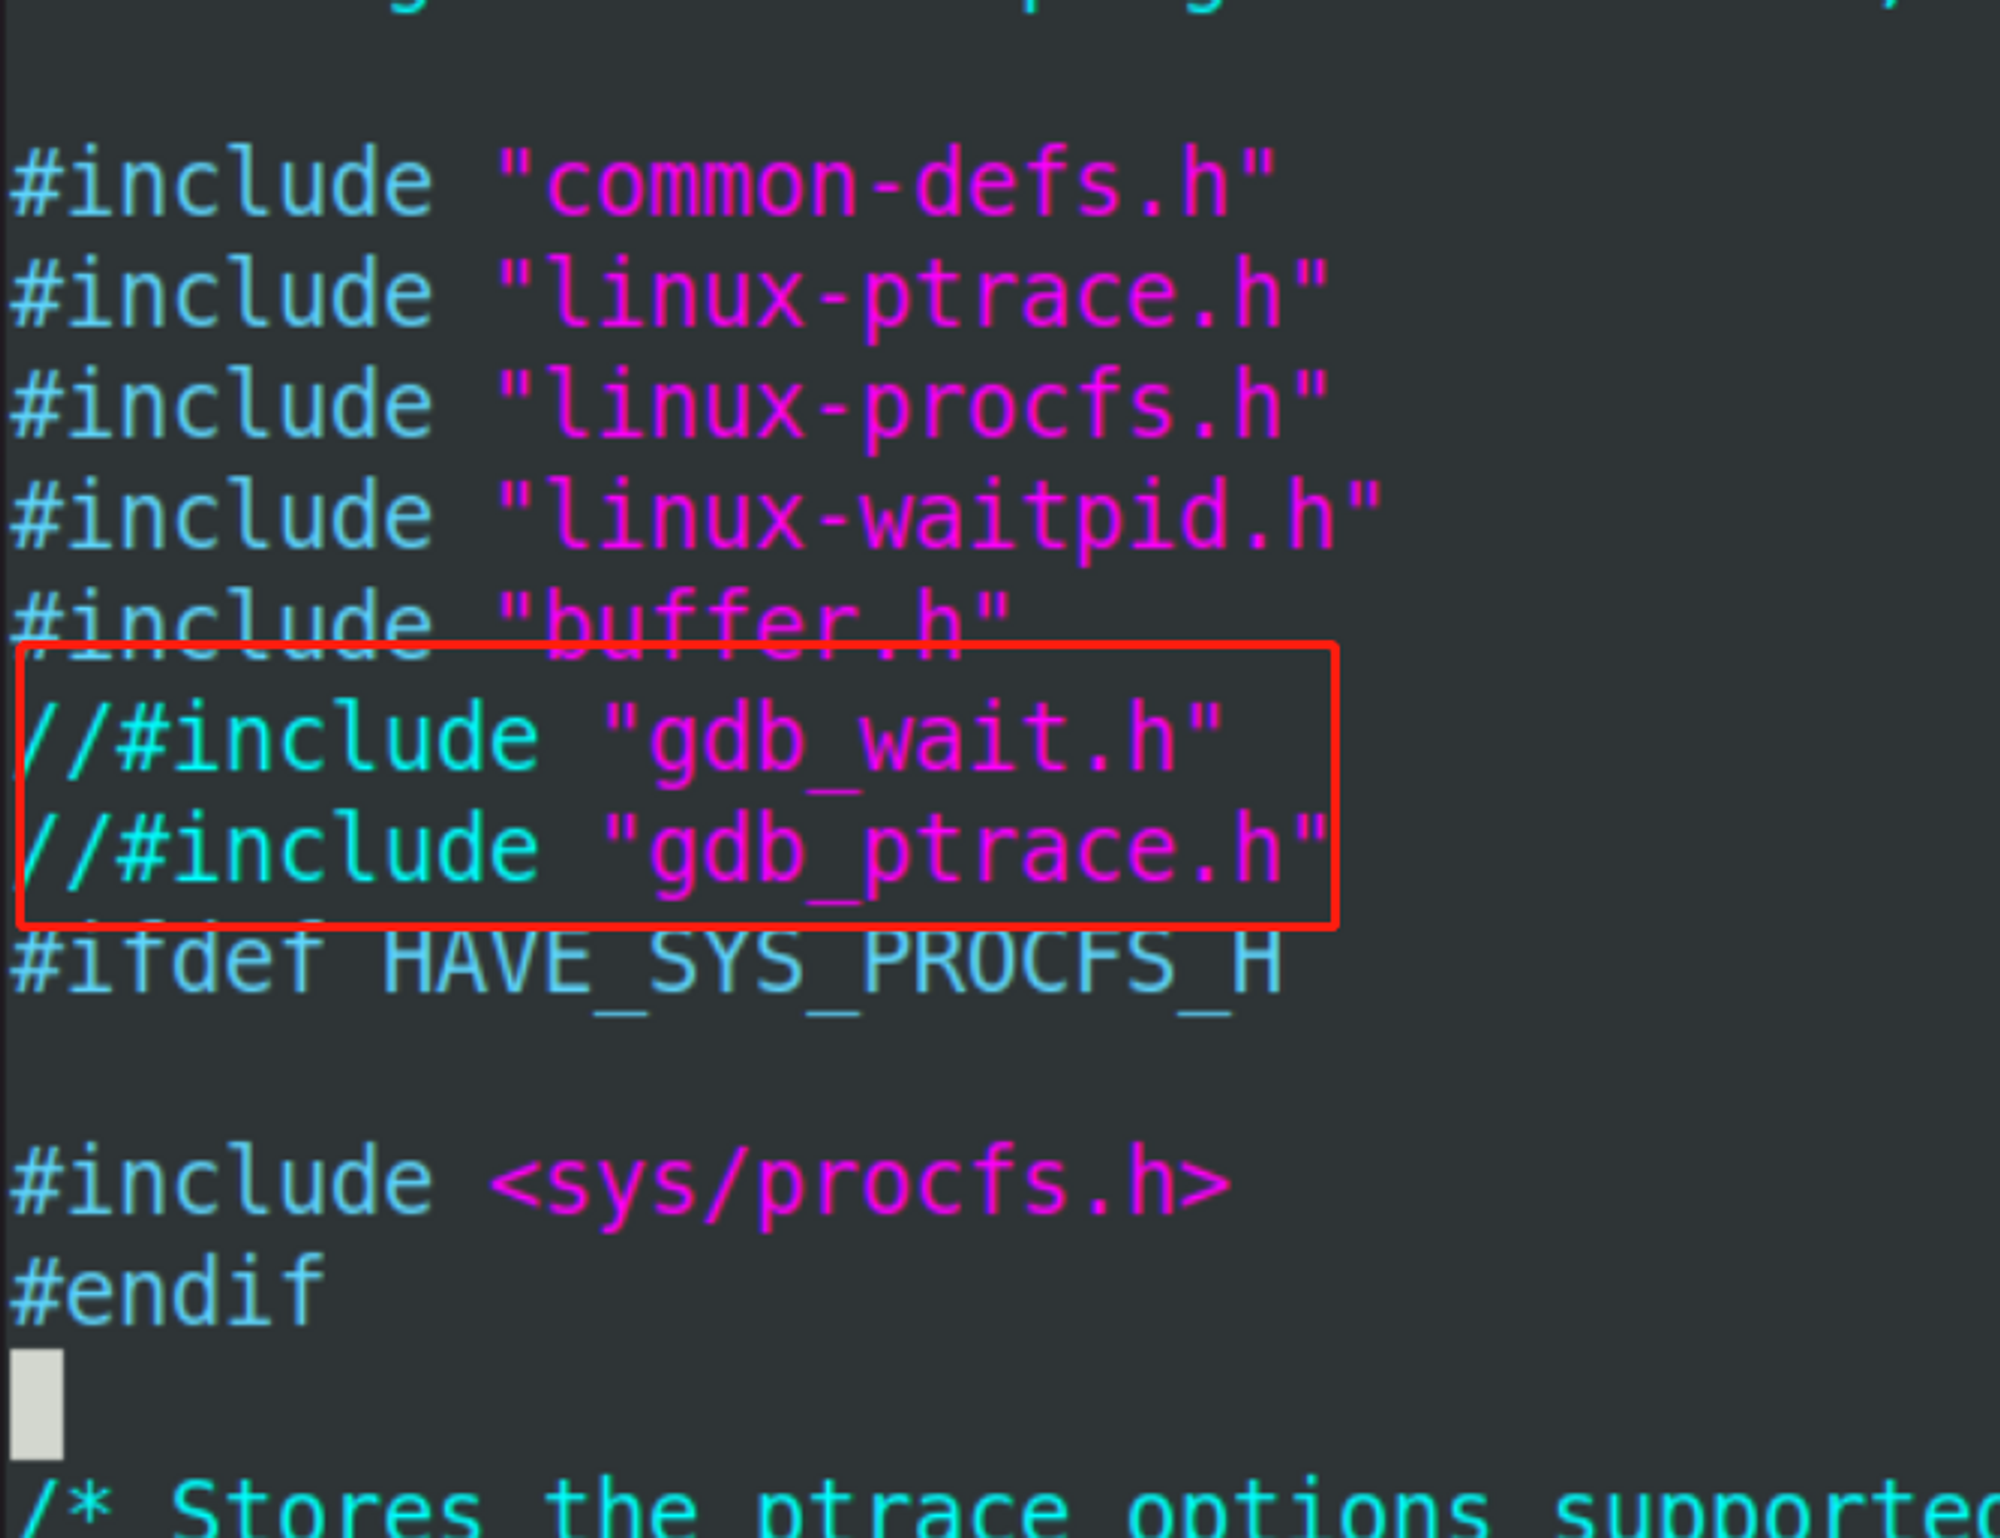
linux-ptrace.h
加入
重新make -j8
再make install
makeinfo not found #
sudo apt-get install texinfo
makeinfo没有安装的错误
运行 #
编写gdb启动脚本
编写qemu启动脚本
root@ljahum-vm:~# vim rungdb.sh
root@ljahum-vm:~# vim dbgscript
root@ljahum-vm:~# chmod 777 ./*
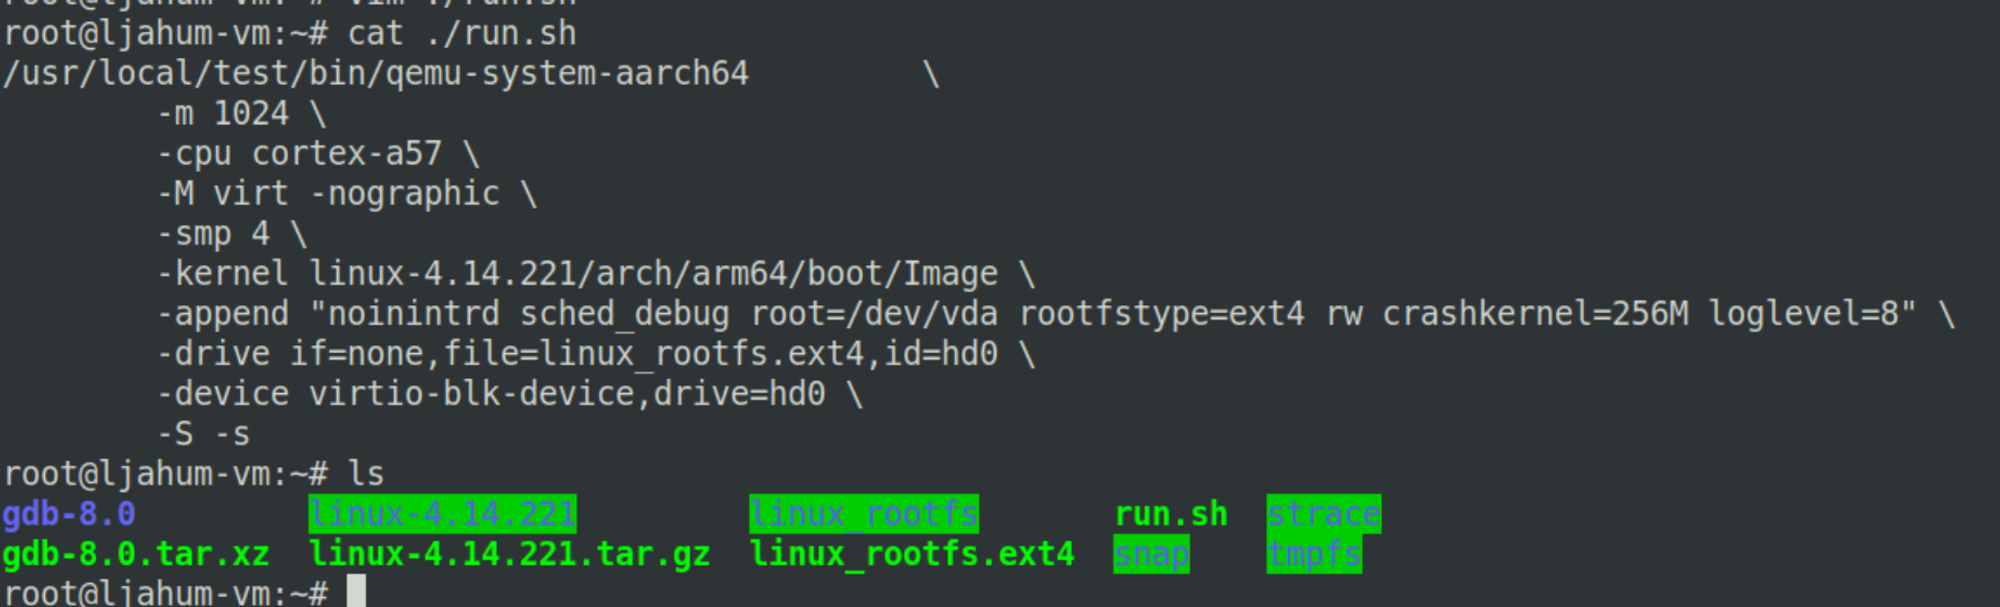
root@ljahum-vm:~# cat run
rungdb.sh run.sh
root@ljahum-vm:~# cat rungdb.sh
#!/bin/bash
aarch64-linux-gdb ./linux-4.14.221/vmlinux -x dbgscript
root@ljahum-vm:~# cat dbgscript
target remote localhost:1234
root@ljahum-vm:~# cat run
rungdb.sh run.sh
root@ljahum-vm:~# cat run
rungdb.sh run.sh
root@ljahum-vm:~# cat run.sh
/usr/local/test/bin/qemu-system-aarch64 \
-m 1024 \
-cpu cortex-a57 \
-M virt -nographic \
-smp 4 \
-kernel linux-4.14.221/arch/arm64/boot/Image \
-append "noinintrd sched_debug root=/dev/vda rootfstype=ext4 rw crashkernel=256M loglevel=8" \
-drive if=none,file=linux_rootfs.ext4,id=hd0 \
-device virtio-blk-device,drive=hd0 \
-S -s
root@ljahum-vm:~#
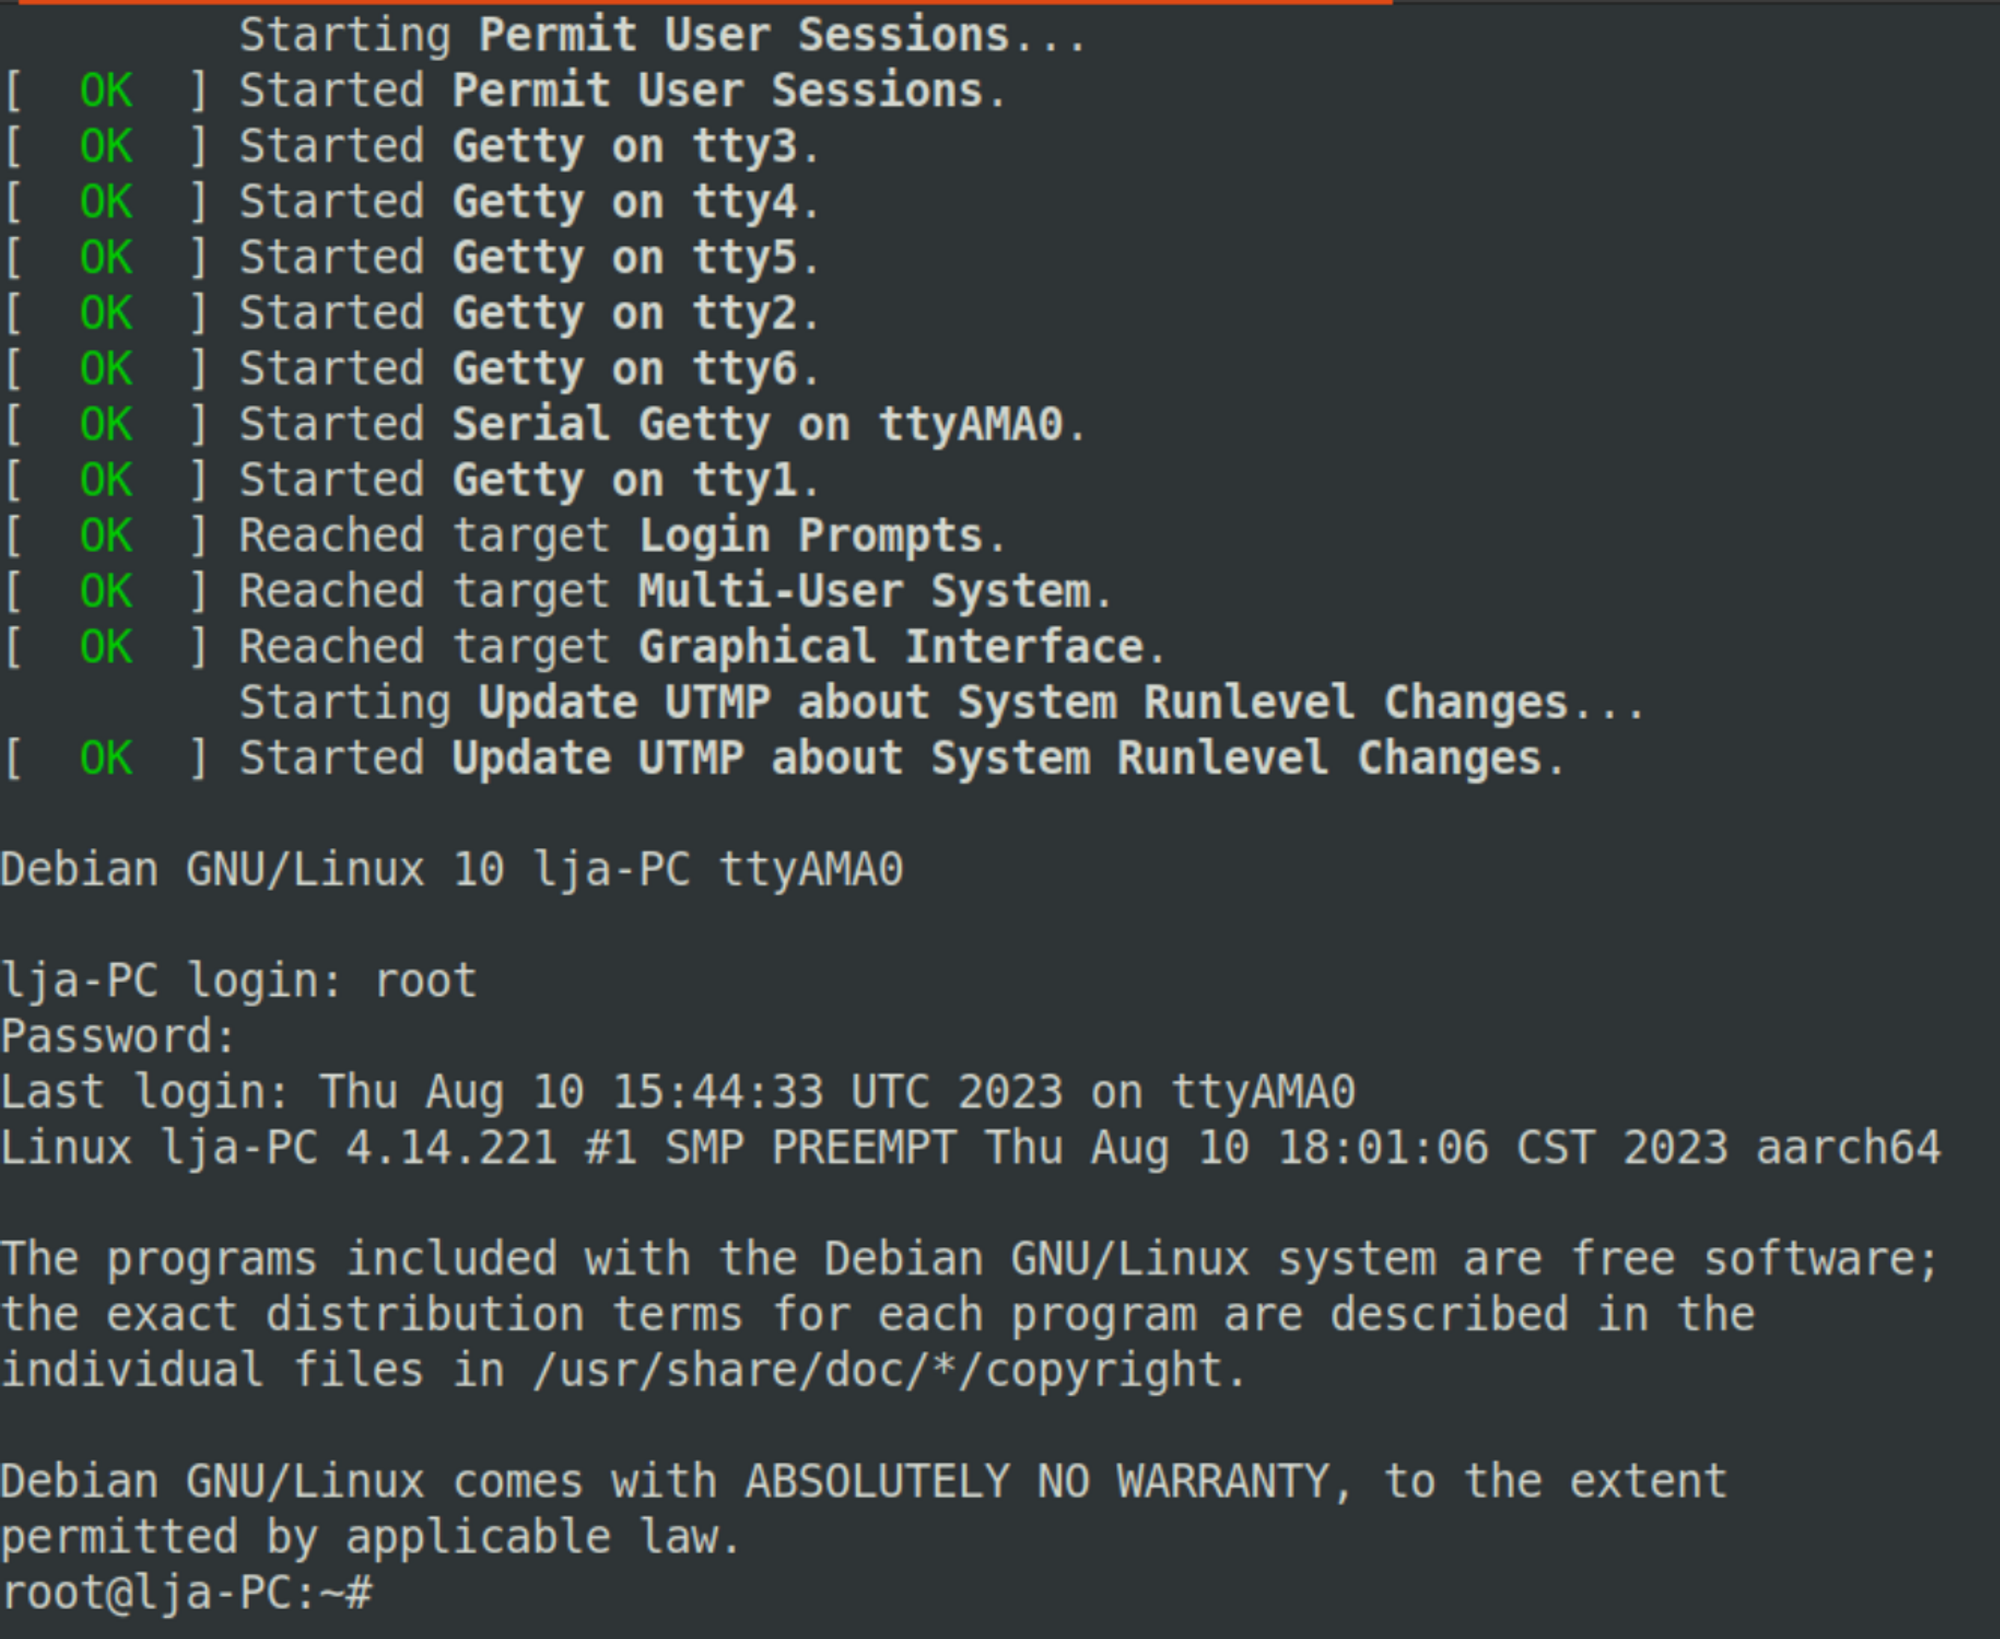
先运行qemu再运行gdb
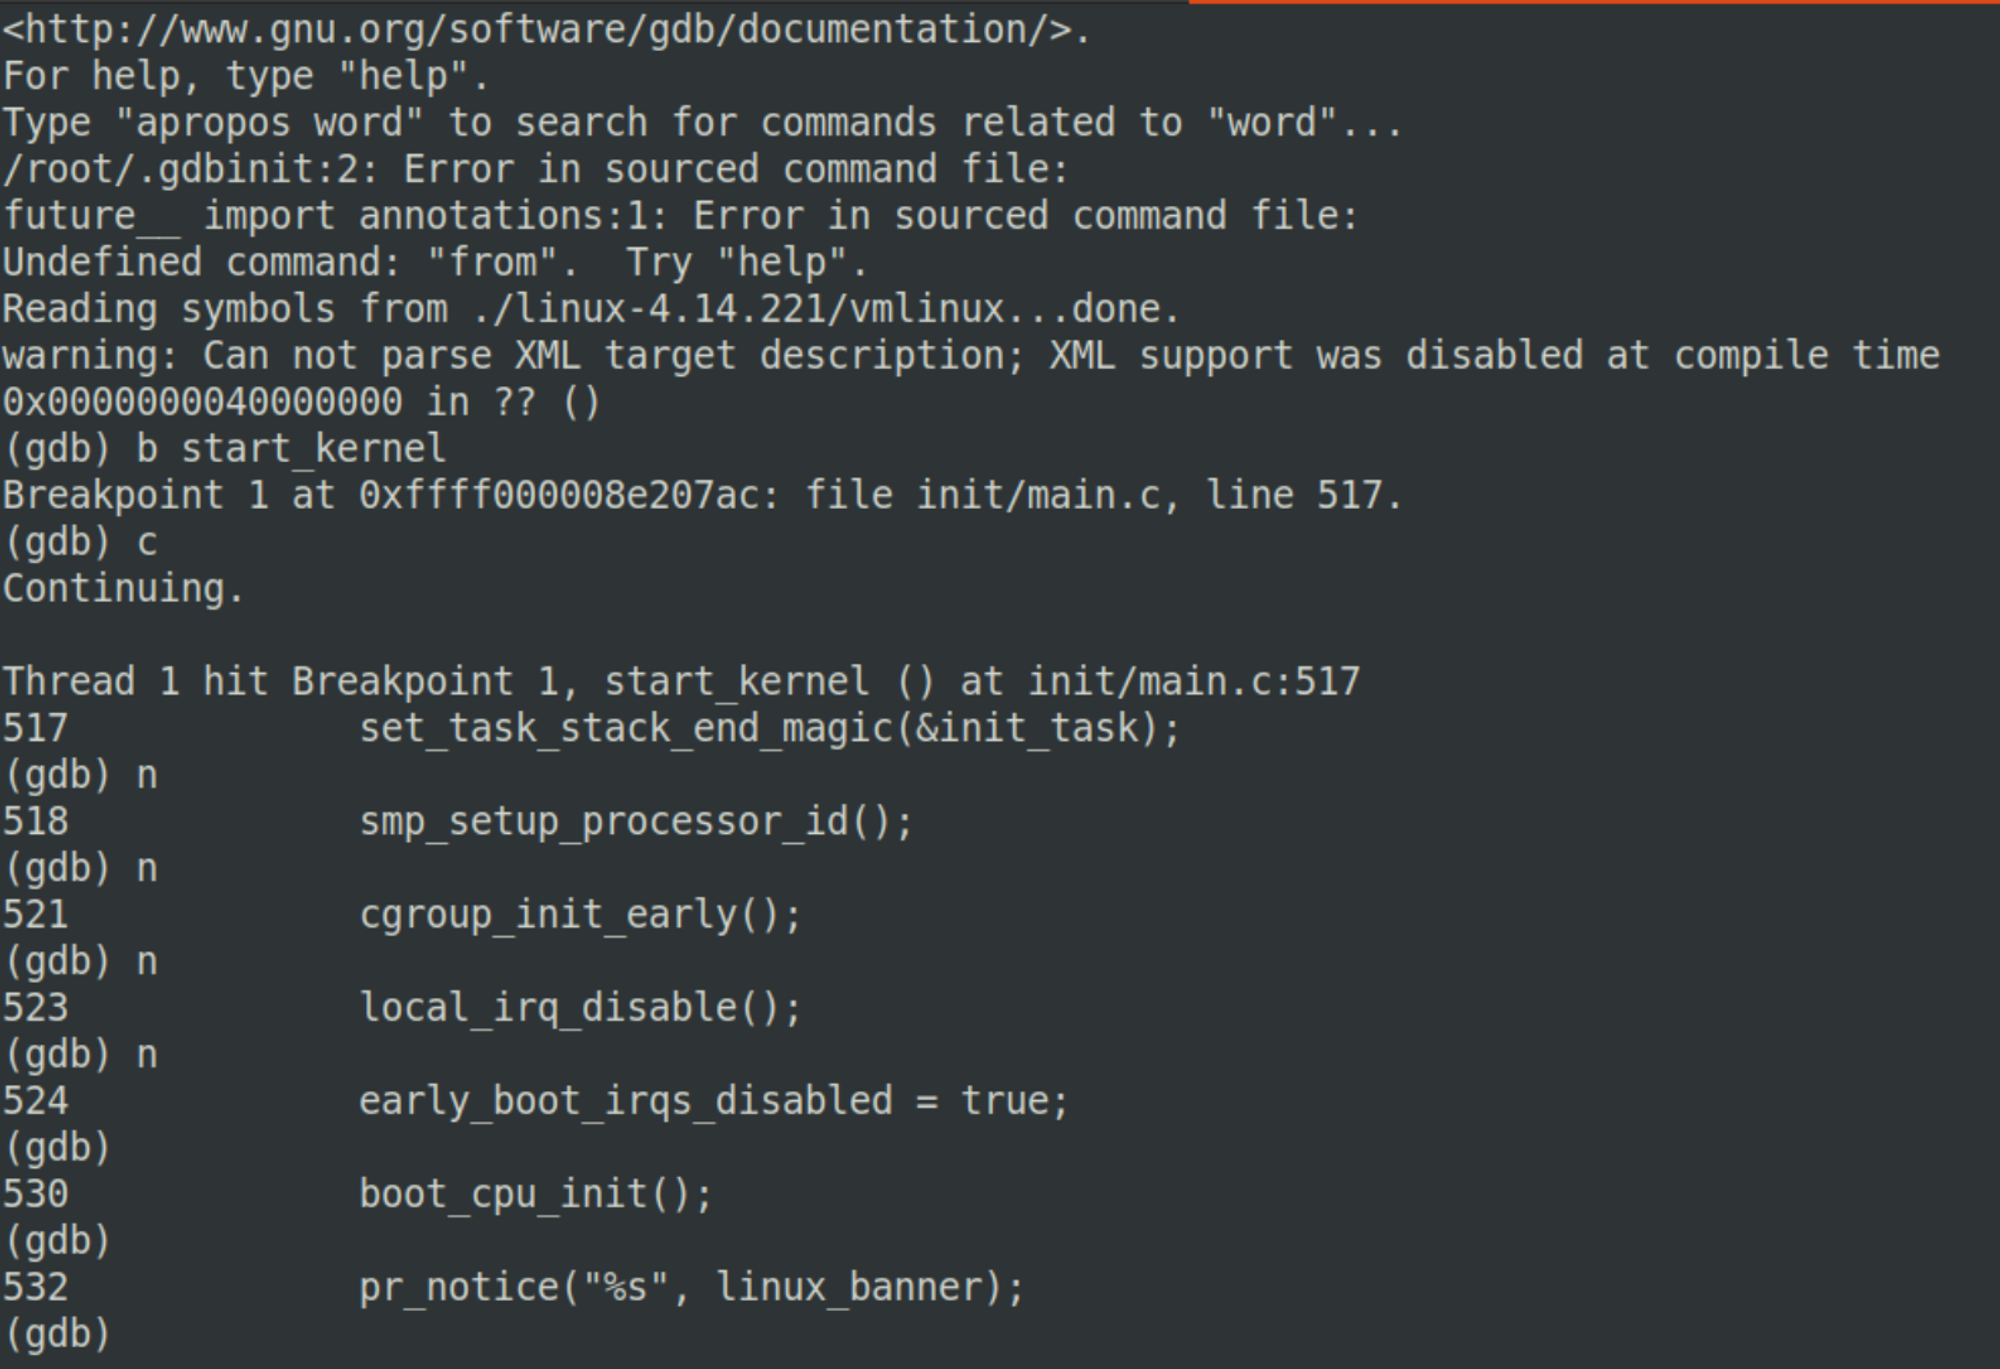
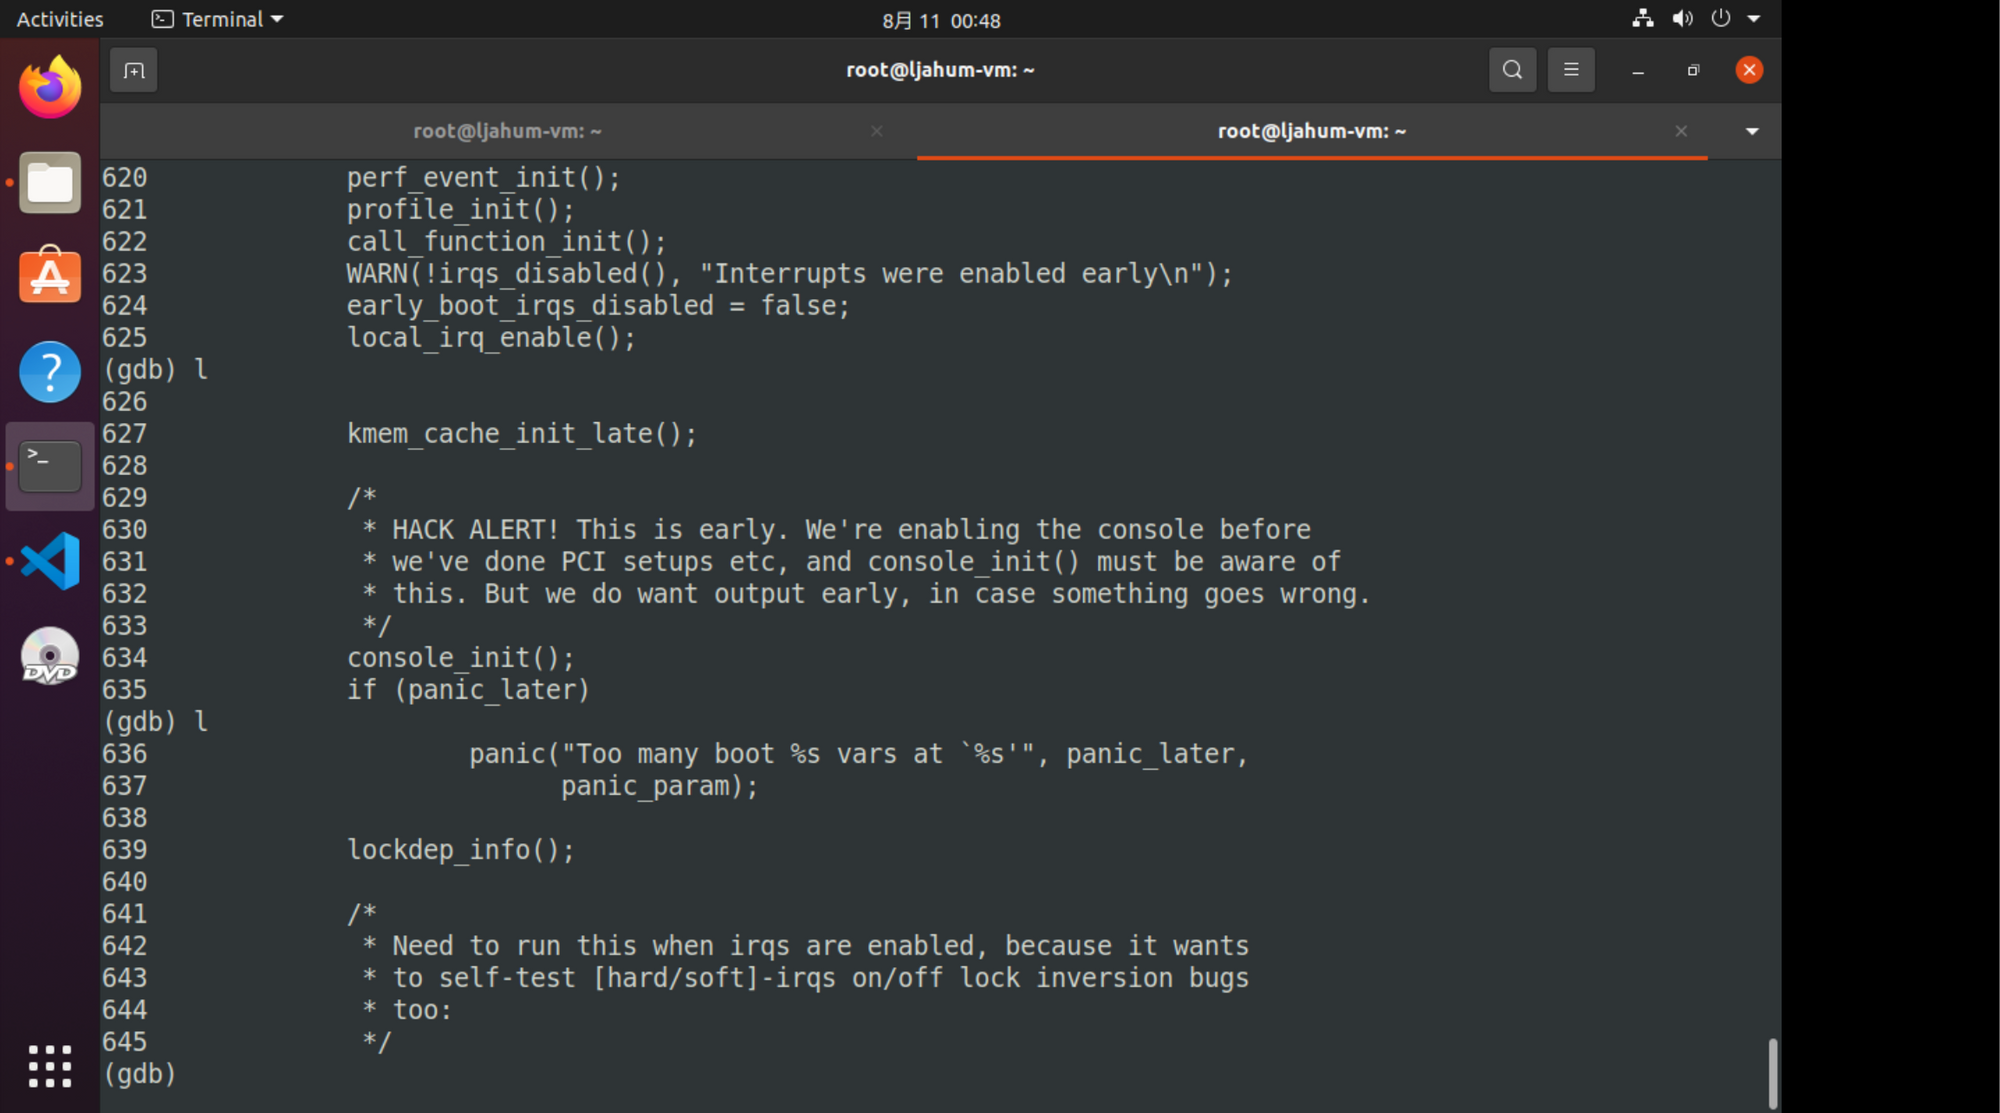
会看镜像的成色
完全符合我对Cortex-A57芯片的想象
root@lja-PC:~# lscpu
Architecture:        aarch64
Byte Order:          Little Endian
CPU(s):              4
On-line CPU(s) list: 0-3
Thread(s) per core:  1
Core(s) per socket:  4
Socket(s):           1
NUMA node(s):        1
Vendor ID:           ARM
Model:               0
Model name:          Cortex-A57
Stepping:            r1p0
BogoMIPS:            125.00
NUMA node0 CPU(s):   0-3
Flags:               fp asimd evtstrm aes pmull sha1 sha2 crc32 cpuid
root@lja-PC:~# ifconfig
enp0s1: flags=4163<UP,BROADCAST,RUNNING,MULTICAST>  mtu 1500
        ether 52:54:00:12:34:56  txqueuelen 1000  (Ethernet)
        RX packets 0  bytes 0 (0.0 B)
        RX errors 0  dropped 0  overruns 0  frame 0
        TX packets 0  bytes 0 (0.0 B)
        TX errors 0  dropped 0 overruns 0  carrier 0  collisions 0

lo: flags=73<UP,LOOPBACK,RUNNING>  mtu 65536
        inet 127.0.0.1  netmask 255.0.0.0
        loop  txqueuelen 1000  (Local Loopback)
        RX packets 2088  bytes 204552 (199.7 KiB)
        RX errors 0  dropped 0  overruns 0  frame 0
        TX packets 2088  bytes 204552 (199.7 KiB)
        TX errors 0  dropped 0 overruns 0  carrier 0  collisions 0

root@lja-PC:~#
可以给网卡配置和虚拟机同网段的ip来传文件(但看起来不需要)